Frying Duck Breast, Step by Step Cooking School and Kitchen Story with Tips


Author:
Thomas Sixt is a chef, food photographer, cookbook author and blogger.
Here he shares recipes, answers cooking questions and helps with cooking.
1. Fry the Duck Breast until crispy, that’s how it works!
A duck breast must be crispy and fine, in the case of a barbarian duck breast roasted pink on the plate. The barbarian duck breast is easy to recognize, it is usually sold individually vacuum-packed. This fine duck breast is highly appreciated because of its low fat content. The duck breast becomes crispy when roasted with two tricks:- First, the breast is incised on the skin side. This allows large parts of the fat to escape during roasting, which makes the skin crispy.
- Secondly, plenty of salt and a longer frying process is needed on the skin side. The salt does not only season but also provides the crispy finish.
2. Frying Duck Breast, the Step by Step Guide
With these instructions, frying the duck breast is child’s play. I will show you how to prepare and prepare the duck breast step by step with photos. I wish you good luck!3. Unpack the Duck Breast and prepare it for frying.
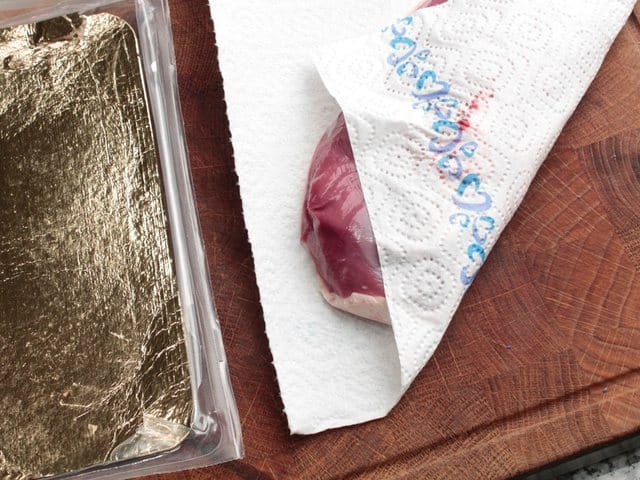
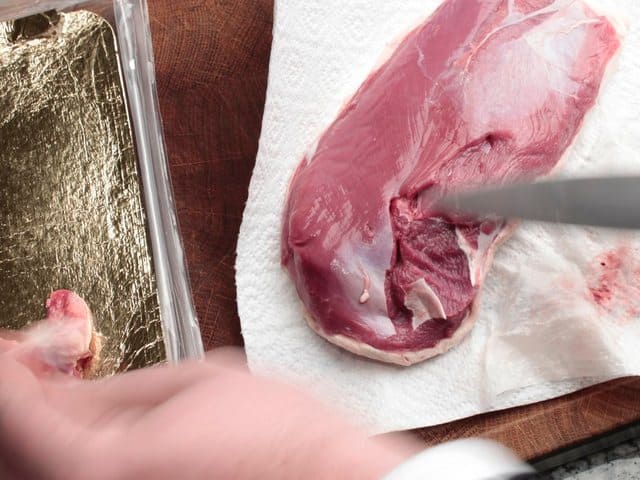
Buy the duck breast and pay attention to the expiry date. You can get the Barbarie duck breast at the poultry dealer and even in the supermarket. Hold the cold chain, especially in summer, the duck breast should quickly come back in the fridge when you come back from shopping.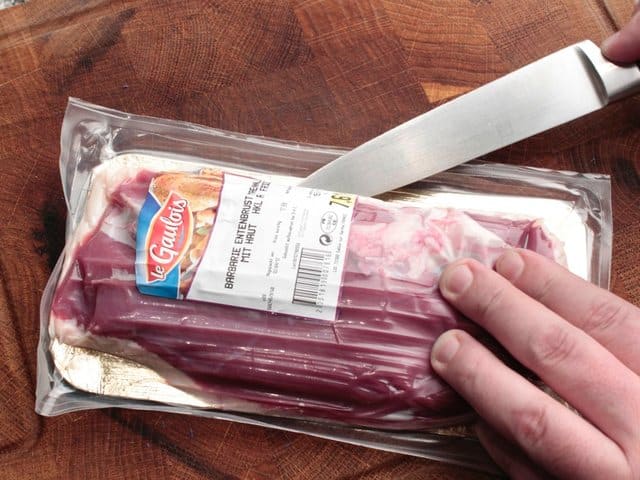
4. Cut the Duck Breast thinly and carefully in a Diamond Shape.
It is important to cut the duck breast skin so that the duck breast stays in shape during roasting and the duck fat can escape. In combination with salt, the duck breast is then crispy due to the direct heat.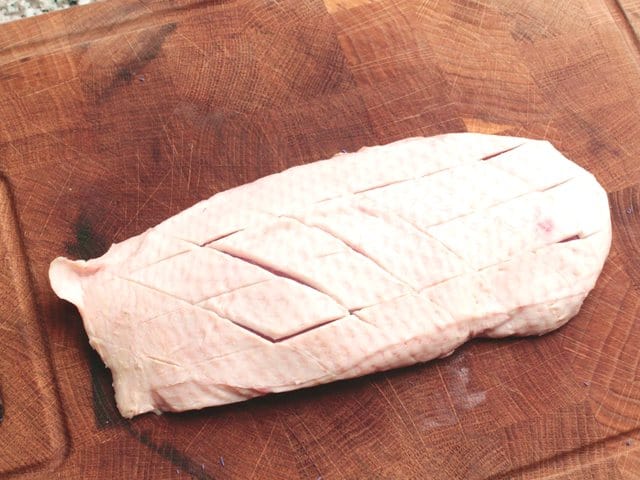
5. Brown the Duck Breast in a Pan
Please preheat the pan well, I like to use a coated pan or as in the picture a small wok. Place the prepared duck breast with the skin side down in the hot pan.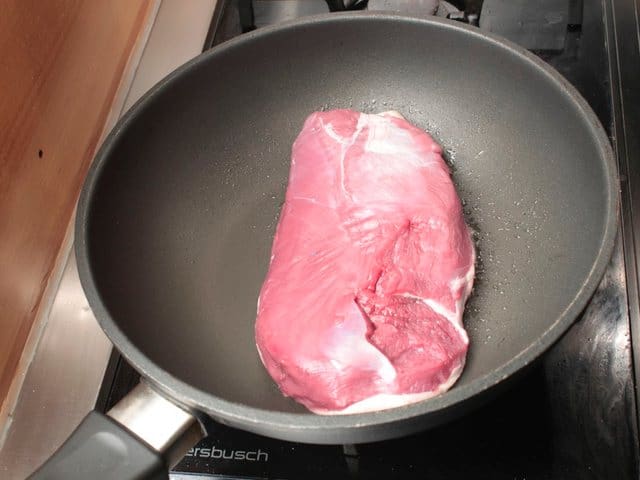
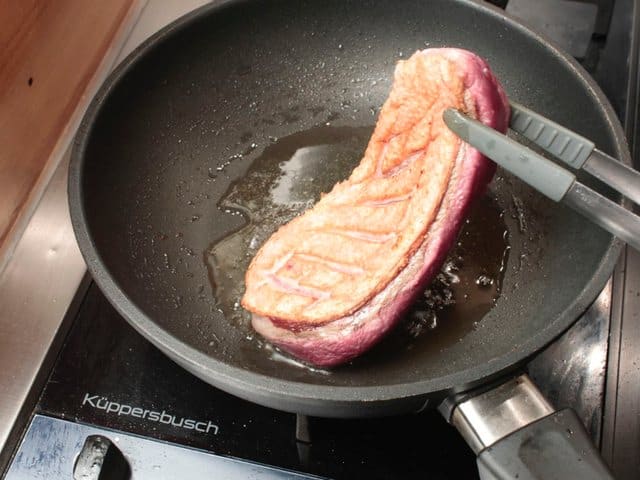
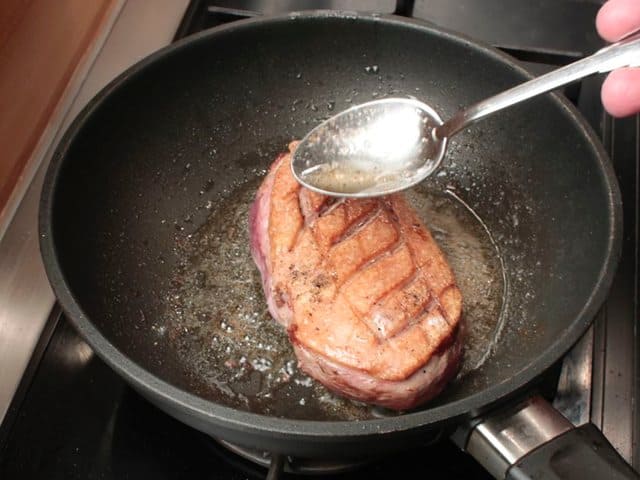
6. How to make the Duck Breast crispy
I’m sure you’d like a crispy duck breast. Season the skin with salt and pepper. Tip: Do not spare with salt, please spice additionally beside the duck breast the duck fat, since you use this in the consequence for pouring over.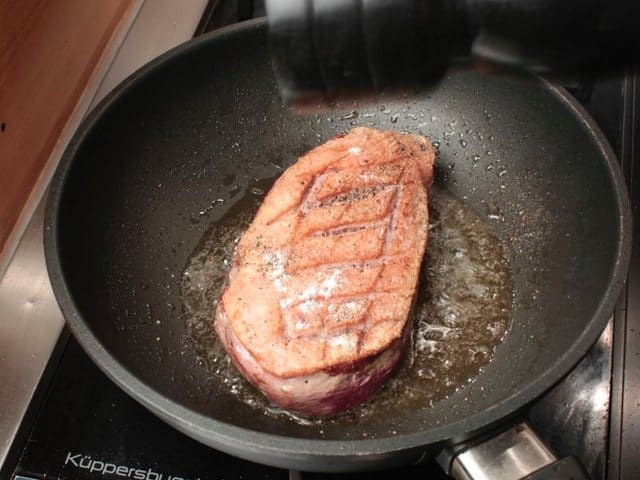
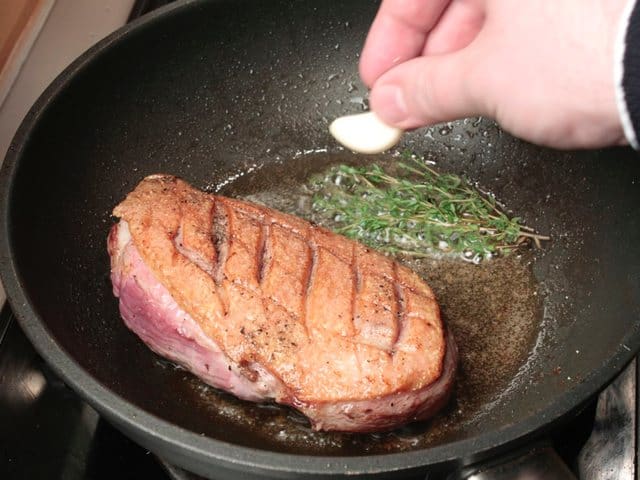
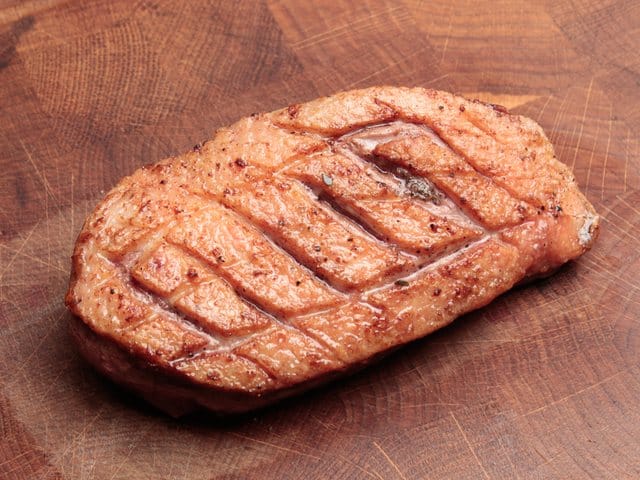
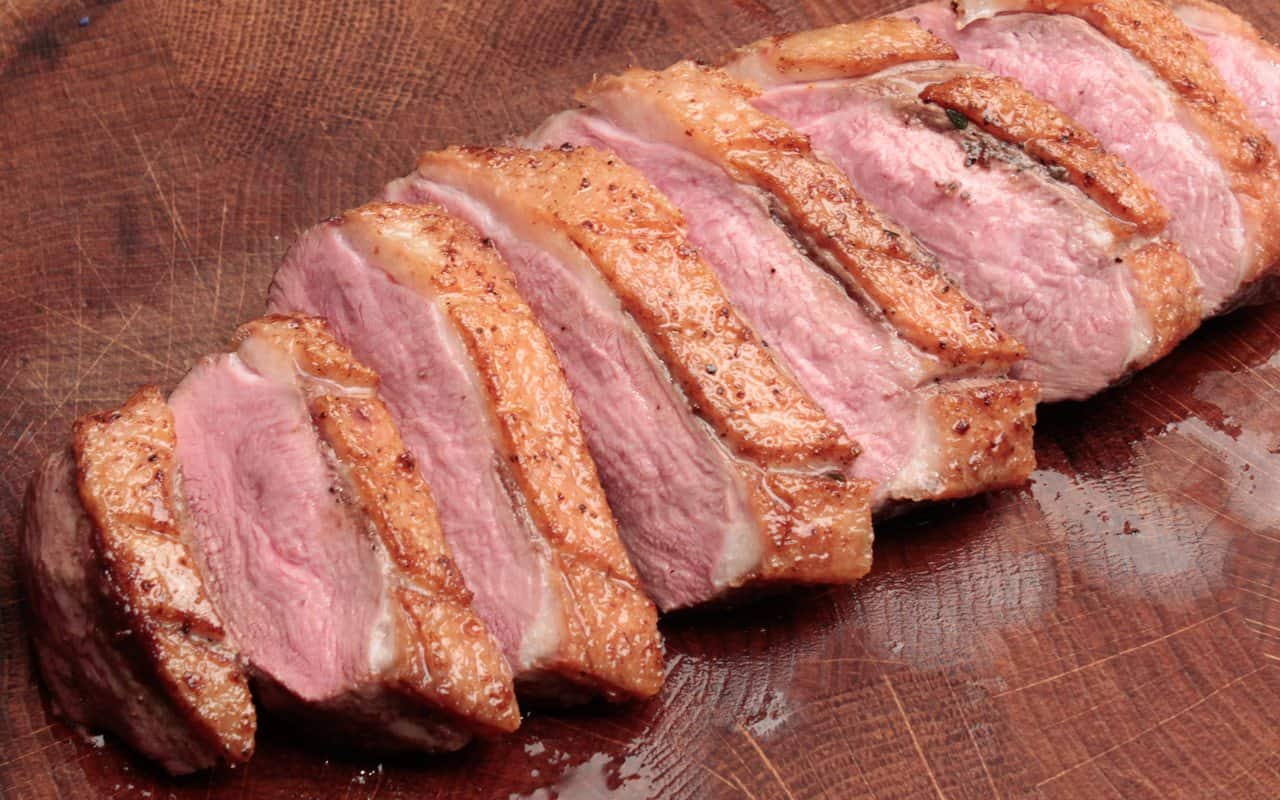
7. Finish Roasting and Slicing the Duck Breast (Carving)
Depending on the thickness of the duck breast, it may be necessary to cook for 8-10 minutes with the lid on. Shortly before slicing, the duck breast is roasted again on the skin side at high heat until crispy. You can now let the duck breast rest for about 5 minutes in the pan next to the stove, or wrapped in aluminium foil, but this is not absolutely necessary for the slow preparation. Then carve and place on the plate. In another Kochwiki contribution I have my tips duck breast sauce summarized.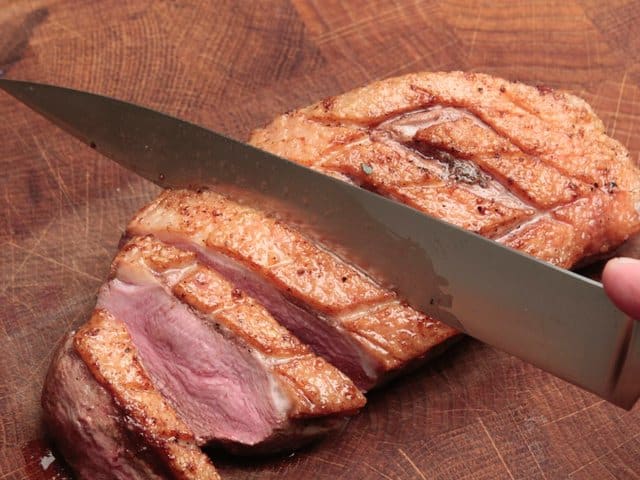
8. Let the Duck Breast rest and why slowly Roasting Duck Breast makes Sense!
Due to the slow cooking of the duck breast, it is not absolutely necessary to let the duck breast rest. After cutting, there is hardly any meat juice on the chopping board.